Wednesday, June 8, 2016

How to Add String Lights to Your Patio

 This spring we did a little makeover on our deck area.  It's a very small deck so it didn't take much.  As an anniversary gift to each other we purchased a new set of deck furniture, added in some small accessories and then finally added in some string lights for ambiance - and now it's our favorite summer spot to hang out! 

 The deck is always my absolute favorite room in the house in the spring and summer time! I just love having flowers surrounding me!


 Every morning I have my cup of hot tea out here while listening to the birds sing - it's my happy place. 

 I went very budget friendly and found all of these blue decor items in the Target dollar spot!  The little blue jars are citronella candles that are perfect to use on summer evenings. 


 I kept one chair and table from our old set to mix in with the new set so we have plenty of seating out here now.  Our old patio set - which is falling apart just a bit - is now being used underneath the deck. 
 This little bubble fountain creates a wonderful trickle sound that makes sitting on the deck so relaxing. 
 Okay - on to how to hang those lights! After we began enjoying our deck so much I decided we needed to figure out a way to get some lights hung.  At the end of summer last year I scored these string lights at Target on clearance for around $3 per set, they are normally around $15 per set.  I had no idea how I would use them at the time but I knew I could figure out a way.   There was a bit of trial and error.  At first we had installed some simple 2x4 type of wood as a post, but it didn't take long for them to start bending under the tension of the lights.  We also had attached the lights to the house with outdoor command hooks but after a week or so those pulled off the house as well.  Now we have it set up nice and secure, yet easy to take down when the season is over. 


 After our bending wood post fail - I went to Home Depot in search of some really large 8 foot wooden dowels instead.  When I saw how much they cost I kept looking for a less expensive option.  It was then I stumbled upon the closet area and found these 8 foot closet rods for only $10 each!  They even had the little decorative caps for the top of the pole to keep any little critters out of there.  We went with white poles since our deck rails are white - but I think using something darker would blend in even better.  If our rails weren't white I would have probably used wooden dowels and stained them a natural wood color, or even painted a metal pole a brown color.  Another option to a closet rod is to use electrical conduit. 
 Then I found these heavy duty closet pole sockets that I thought we could just screw into the decking to hold the pole in place, yet still be able to remove quite easily once summer was over.  I will leave the socket in place and just simply remove the poles. 
 Then some simple S shaped curly screw things - I have no idea what they are called but I found them in the screw area. They are easy to wrap the lights around with no worry of them slipping off.  My hubby just drilled a small hole in the pole and screwed in the curly screw thingy :)
We also used simple zip ties higher up on the pole for added security to keep the poles in place during those summer thunder storms. 
We used the same kind of screws placed into the siding at three different points on the house.  This picture above shows where our electrical outlet is just behind the fern.  We have two sets of lights to plug in so that we didn't string too many sets together.


 When those summer afternoons start to fade into twilight, the family slowly trickles out to the deck to unwind from our day.  The lights make such a fun setting and add just the right ambiance.  Soon the summer bugs start to drive us back indoors and we say good-bye until morning when we are out once again for breakfast and tea! 


 In the picture above you can see the large deck box where we keep all the cushions protected when it rains or even from the overnight dew.  The shade umbrella still works even with the lights up.  We can just open it right up and it goes under the lights and lifts them just a bit.  

Happy Summer Evenings! 


Friday, June 3, 2016

Timberdoodle Review - Paint by Number Museum Series

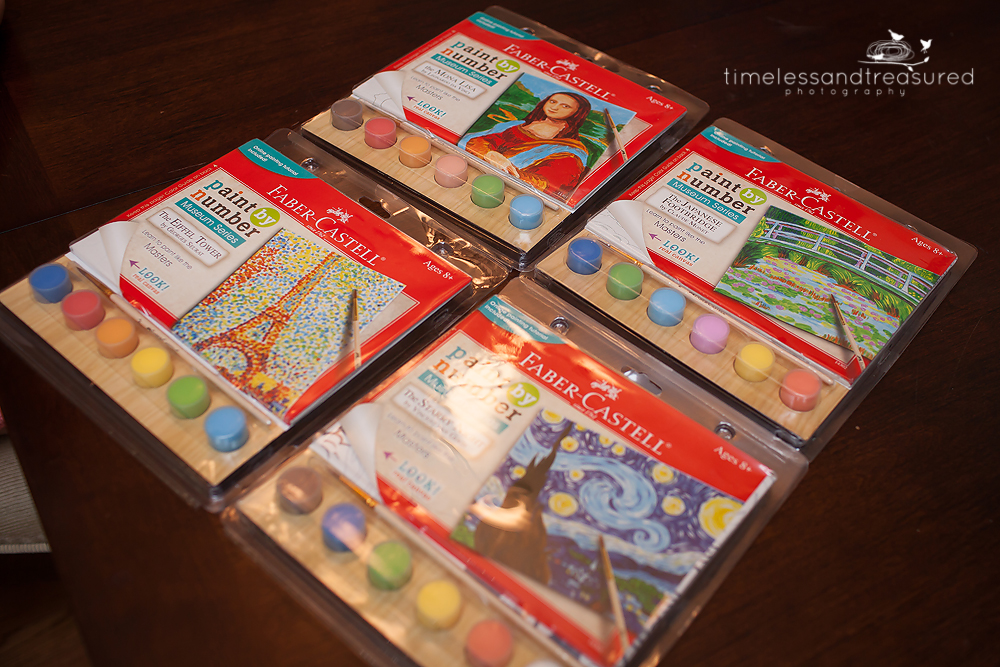
Another fun Timberdoodle product review for you!  This is called the Paint By Number Museum Series.  What a great follow up to our year of fourth grade studies of Monet and Van Gogh!  Boo studied Georges Seurat a few years ago and da Vinci will be part of our fifth grade art curriculum.  

The Museum Series includes four different works of art - The Starry Night, The Japanese Footbridge, The Eiffel Tower and the Mona Lisa.  Since we had four kits - all four girls in the family (including me!) had a chance to experience the kit and give their own review.  Plus we had a great family paint night in the process - for a much more reasonable price than if we had gone out for one of the popular paint nights at a local business. 

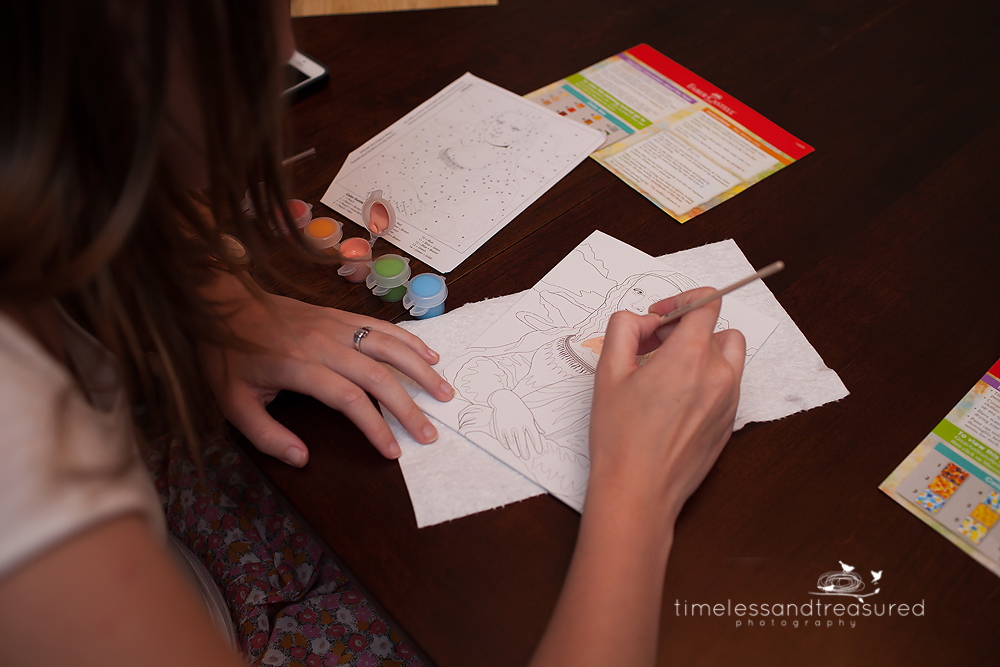
 What we loved most about these paint by number kits is the fact that the numbers are not printed directly on the canvas.  There is an included reference sheet with the numbers on them that you can refer to.  The canvas itself is excellent quality and will last for a lifetime! 

 Everyone chose their favorite and got to work! Boo wasn't super thrilled that she ended up with the Eiffel Tower by Seurat - but sometimes that's just life with having two big sisters.


 We each worked for several hours on our pieces.  Banana (our middle girl) is our resident artist and we all knew hers would be gorgeous!  The rest of us hobbled along following the directions carefully.  We decided that the paint color options on each of our palettes could have been a little better, but they were pretty close to what the originals should look like - with perhaps an exception to the Mona Lisa.   There was a bit of blending and shading to do so that could have been user error on our part.
 Punkin worked on the Mona Lisa and Banana did the Japanese Footbridge.  You can see in the picture above that Boo started to lose interest and started doodle painting on her napkin!  The enclosed reference sheet gave some fun facts about each artist that we could discuss as we were painting which helped with the educational aspect of our paint night.
Banana was totally rocking the Japanese Footbridge :) 
I was the lucky one to get Van Gogh's Starry Night - I had so much fun painting this and the kit was set up in a way that made it very easy to feel like a successful artist! The attention to detail was excellent!  There were clear directions on how to mix colors to get a more desired effect.  Part of the packaging could even be transformed into a tiny little easel to display your art work.  I plan on framing each of these to display on the wall somewhere all together.

Boo (who is 10) lost interest after a few hours so hers will still need to be completed.  Her piece used pointillism (a technique using small dots to form an image) which is probably a bit more difficult than free hand painting.  Punkin was a little disappointed in the final color of her Mona Lisa.   The recommended age for these is eight and up and is part of Timberdoodle's Third Grade curriculum kit.  We all certainly enjoyed our fun paint night.  These would be an excellent addition to your art study curriculum - you can read a bit more about how we study art in our morning basket time by clicking HERE .


Thursday, June 2, 2016

Timberdoodle Review - Simbrix Expert Kit

A highlight of our summer days is when we see the delivery truck arrive with a new Timberdoodle shipment for us to review!  Today's review is for the Simbrix Expert Kit.   This product is included with Timberdoodle's Fourth Grade Curriculum Kit, though it is for ages 5 and up.  Even my college girl enjoyed playing and creating with Simbrix! 

What exactly is Simbrix? The best way we thought of to describe it is a cross between legos, Minecraft and Perler beads.  They are tiny little brick like square beads that interlock. 

The kit comes with two large bags of a variety of colored squares and one small bag of glow in the dark squares. 

They are quite small but large enough for developing fine motor skills with small children. 

They were developed and created in Nottingham, Great Britain and they come with this very handy canvas drawstring bag for storage.  Cleaning up was a breeze.

My college aged big girl Punkin right away did a google search for "pixel art" once she discovered how the squares interlock.   Her fiance' (wowsa - not quite used to that yet - she is recently engaged - hooray!!), her fiance' loves spiderman so she got right to work on creating him. 

It's always a plus when the sisters who are ten years apart in age find something they both enjoy doing together. 


 My girls both noticed that they were thinking through the building process in a "square" way very similar to how you build and create with the popular video game Minecraft. 
The cutest dog in the world loves to make an appearance in every Timberdoodle review.  He gave Simbrix two paws up! (and he didn't even try to taste one). 


The first thing Boo created (who just happens to be a fourth grader) was a quick and easy ladybug which was shown on the enclosed inspiration sheet. 


Punkin made quick progress on Spider Man but soon discovered she ran out of red before he was complete, so she had to improvise a bit with color selection. 

Boo made a cute little duck next. 


Soon she was creatively playing that Spider Man had a pet duck.  The great part about Simbrix is they interlock and stay together very well so you can pick up your creations and play with them similar to how you would play with legos.  They don't fall apart!  

Since it is summer time and homeschooling is on the back burner for now, we just had creative fun with Simbrix.  I can see how I could easily adapt it into a kinesthetic learning tool.  We could build a whale or starfish as we are learning about ocean life in science, we could build a replica of a burning bush as we read about Moses during bible time, or even create the flag of the country we are studying about in geography.   The possibilities are endless - and it's possible to even create 3D objects from Simbrix if you wanted to.  The directions also suggest being able to heat fuse the bricks together just like you would with the perler beads if you want to keep them fused together permanently.  We love Simbrix because you don't need a pegboard to creative something like with perler beads, plus they are much more durable and easy to work with. They work well for many ages and are a great way to keep hands busy while listening to a read-aloud as well. 

Edited to add another picture of creations they made - they can't put these things down! 

Simbrix is not only great summer fun it is also very educational - a big win for any mom whether you homeschool or not! 

I was sent this product to review as a member of Timberdoodle's blog team.  All opinions are strictly my own.